Monday, December 24, 2012

Sourdough Flatbread

I love sourdough bread.  Recently, I recieved a sourdough culture so I could make my own sourdough items.  I have found that I don't really want sourdough bread every week.  However, you are supposed to use the starter every week then feed it.  I have been trying to find different recipes to use so the starter doesn't go to waste.
I found this recipe for sourdough flatbread and my family really enjoyed it!

Sourdough Flatbread
Adapted from My kitchen addiction blog
Makes eight flatbreads.

  • 1 cup unfed sourdough starter (straight from the fridge)
  • 1/2 cup milk (I used whole)
  • 1 small container nonfat Greek yogurt

  • 1 teaspoon baking powder
  • 2 cups white flour
  • Pinch salt
  • 1 tablespoon melted butter

Combine the sourdough starter, milk, and yogurt in a large mixing bowl.  Whisk together until smooth.  Then stir in the remaining ingredients.
Cover with a towel and set in a warm place to rest for an hour or so.
Set up an area to knead the dough with more flour.  It starts out pretty sticky, you will need at least one more cup of flour.
Knead the dough until smooth.
Divide the dough into eight balls.
Heat a heavy frying pan over a medium heat.
Squish one of the dough balls into a flatbread.  This doesn't need to be perfect.  Just use your hands and flatten it!  I squished mine until they were about a quarter of an inch thick.
Melt some butter in your frying pan and add in the flatbread.  Cook for about a minute or two on each side.  You should have nice golden brown spots all over the flatbread when it is done.  While it is cooking, squish out the next piece.

These were sooo good!  They were delicious with our lasagna soup for dinner.  My eleven year old suggested that I make more to use in lunches for the bread in sandwiches.
Of course I forgot to take pictures of the process.  Here is a picture of the leftovers.  I am planning to eat these for lunch today!

Tuesday, December 18, 2012

Homemade Sauerkraut

A few months ago, I decided to try and make some homemade sauerkraut.  My family loves that briny cabbage.  All the recipes I looked at made the whole process seem so simple.  Why was I paying more for a jar of commercial sauerkraut than I was for an entire head of cabbage?  I was worried we wouldn't like the home fermented sauerkraut.  I was worried it would just mold and I would end up with a bunch of nastiness. I didn't have a giant earthenware crock or a place to put the crock.  How could I make my own sauerkraut?

Well, one day I stumbled upon a recipe for a per quart jar of sauerkraut.  Really, it wasn't much of a recipe.  Cram a quart jar with chopped cabbage, add in some salt and a sweetener if you want, then fill it up with some boiling water.  Then let it do it's natural thing for a bit of time in a dark area.  Voila!  Homemade sauerkraut!  I figured this was a doable amount for an experiment of home fermentation.

I bought a small head of green cabbage and brought it home to try.  After chopping up all that lovely cabbage, I crammed it into four quart jars.  I used a wooden spoon to cram it in there nice and tight.  I left a good inch of headspace ala most canning recipes.  Then I added 1 teaspoon of canning salt and 1 teaspoon of local honey into each jar.  I topped them all off with boiling water, leaving the headspace.  I put lids and rings onto the jars just tight enough to keep the lids in contact with the jar,but not tight enough to stop any liquid from escaping during the fermentation process.  Then my little beauties went into a plastic bin in the back of the cupboard for five weeks.

A. M. A. Z. I. N. G.

This is the best sauerkraut I have tasted since going to Leavenworth and tasting the authentic German foods there.  I am definitely going to make some more of this heavenly fermented goodness.  So simple.  So delicious.

Tonight we are eating the sauerkraut with kielbasa for dinner.  MMMMM!


***Update***
Since writing this post, I have had issues using regular table salt in canning recipes.  After some research I learned that using table salt can affect the flavor of your end product.  I have changed the post above to using canning salt.  


Monday, December 3, 2012

More carrot adventures...


Well, I made more progress on that giant bag of carrots that I bought last month.  So far I have ten quarts of sliced carrots to eat and five quarts of pickled carrots.  The pickled carrots tuned out to be delicious.  The canned carrots will be a nice addition to dinner in the future.  Canning the carrots was really simple.

First, I peeled and sliced a giant mixing bowl of carrots.  Then I doled them out into my hot, sanitized jars.  I put just under a teaspoon of salt into each jar.  The recipes I read said you could leave the salt out, but I figured the carrots would be pretty bland without it.  Then I topped off each jar with boiling water, leaving an inch of head space for processing.  They all went into the pressure cooker for a thirty minute processing time.

In other news I received my Christmas present early from my wonderful husband.  A new iPad to play with!  It has a definite learning curve and my blog may look a bit different as I learn how to best use it.
 
***Update***
 
The pickled carrots were FANTASTIC!!!
The canned carrots, not so much.  They had a funny almost metalic flavor that none of my family could get past.  After some research I found out that using table salt in canning recipes will do that to your end product.  So, lesson learned.  I now have canning salt in my cupboard, and my chickens enjoyed a few quarts of cooked carrots.  That's life!


Tuesday, November 13, 2012

Verna's Bean Casserole

Every month our church has a potluck lunch.  The one dish that always leaves empty is Verna's Bean Casserole.  It is delicious!  I have the church cookbook, and discovered the recipe is in there.  I was so excited!  I wanted to can this little bit of heaven and be able to have it for lunch at work, just like I have my homemade soups.  Then I realized several of the ingredients were from a can or frozen bag.  Dang.
This post is going to be my adventure of altering the original recipe from it's current form to a from scratch version that I can put through the pressure canner.  This morning I'll post the original recipe.  As I figure out how I want to change things, and find recipes to use, I'll come back and edit.  Hopefully, by the end, I'll have a lovely version of Verna's Bean Casserole from scratch.

Verna's Bean Casserole
from The Fruit of Our Labor Raymond First Baptist Cookbook 2003

1 lb. ground beef
1/2 cup chopped onion
1/2 cup brown sugar
1/2 cup catsup
1 tsp salt
1 (1lb) can red kidney beans
1 1/2 tsp chili powder
2 Tbsp vinegar
1 Tbsp prepared mustard
1 (No.2) can pork and beans
1 (12oz) package frozen lima beans

Saute beef and onions in large skillet.  Add sugar, catsup, salt, chili powder, vinegar and prepared mustard.  Stir well.  Add pork and beans, red kidney beans and lima beans.  Pour all ingredients in greased casserole and bake at 350* for 1 1/2 hours.

Monday, November 12, 2012

Spicy Dill Carrot Pickle Slices

Recently, I purchased a 25 pound bag of carrots.  I just couldn't turn down the great price.  It was $2 for a 5 pound bag of carrots, or $7 for 25 pounds!  Of course, after I got home with my ginormous bag of carrots I realized I needed to figure out how to USE 25 pounds of carrots.  On my list of todo's was to pickle some.
Now, I love nice crisp dill pickles.  I have made pickled green beans and pickled asparagus in the past.  I used a recipe a friend gave me, but it was a sweeter recipe.  No one in my family likes sweet pickles.  I still have 2 jars of pickled green beans up in my cupboard 5 years later because no one will eat them.  I wasn't going to make that mistake again!

Here is the recipe that I was inspired by.  A nice sounding spicy dill with NO sweetener.  Of course, I can't leave well enough alone and I had to increase the garlic, reduce the hot peppers, and change all the proportions and instructions.

Here is my recipe.  I'll let you know in a couple of weeks how they turned out!


Spicy Dill Carrot Pickle Slices
Makes 5 quarts

1 9x13 baking dish full of sliced carrots
30 cloves garlic
8 cups vinegar
8 teaspoons dried dill
3 cups water
½ cup salt
3 teaspoons red pepper flakes

Put vinegar, water, dill, salt, and pepper flakes in nonreactive pan and bring to a boil.

In the bottom of each (hot and sterilized) quart jar, slice 3 cloves of garlic.  Fill jars packed with carrot slices up to one inch from the top.  Slice remaining garlic on top of carrots (3 cloves in each jar). 

Fill with pickling fluid, leaving 1 inch headspace.  Put on the lids and rings.

Process in a hot water bath for 15 minutes. 

After jars have cooled, check to make sure they sealed correctly.

Let jars sit for at least a week to let the carrots really pickle.

Okay, I let them sit for two weeks. Oh My Goodness!  These were a hit.  Nice dill flavor, a little spice  but not too much, and a great garlic undertone.  So yummy!  I'll definitely make these again.

Wednesday, November 7, 2012

Ginger Cream Cookies


One of my favorite cookies is Ginger Creams.  They are so mild and lovely!  Not too sweet, but enough that they still taste like a treat.  They have a very cake like texture.  I’ve always thought they would be delicious made into a sandwich with cream cheese frosting in the middle.  We have always eaten them too quickly for me to find out though!
Ginger Creams
¼ butter melted
½ cup sugar
1 egg
1/3 cup molasses
2 cups sifted flour
½ tsp soda
½ tsp salt
1 tsp ginger
1 tsp cinnamon
½ tsp cloves
½ cup water

Cream together butter and sugar; beat in egg.  Stir in molasses.  Sift dry ingredients; add alternately with water.  Drop by spoonful onto greased cookie sheet. (I often forget to grease the cookie sheet, they will stick!) Bake at 400*f for about 8 minutes.

These would be great with frosting, but I never take the time.

Inspired by the Better Homes and Gardens Dessert Cookbook 1960.

Monday, November 5, 2012

Salsa Chicken

This is one of my favorite go to recipes.  It makes a nice filling for tacos, enchiladas, or topping on a taco salad.  You can increase everything and cook in a slow cooker all day while you are at work, or you can put it together in an evening on the stovetop.  Leftovers freeze well if you make a larger batch.  This recipe is just enough for my family for a dinner.  There might be one or two servings of meat leftover for lunch the next day.

Salsa Chicken
2 chicken breast halves (boneless and skinless)
2 cups of your favorite salsa
1 cup fresh cilantro chopped
1 baby lime, juiced

Put the chicken breast and salsa into a sauce pan.  Simmer until chicken is done, approximately 1 hour.
Once the chicken is cooked through, put the chicken into a bowl to cool a bit.
Chop the cilantro finely.  Add cilantro and lime juice to the remaining salsa in pan.
Shred the chicken breasts.  I use two forks and break the breasts up so they will cool faster.  Then I just use my hands to pull them apart into the shreds.
Stir your chicken breast shreds back into the salsa sauce.

Serve as a taco filling.  Use in enchiladas.  Top a taco salad.

Here are my salsa chicken taco truck style tacos.  It's just the Salsa Chicken filling, homemade corn tortillas, some shredded cheese and a couple of slices of avacado.  AMAZING!!

Sunday, November 4, 2012

Fantastic Mashed Potatoes!

My family loves mashed potatoes.  The majority of the time, we don't even use gravy because the potatoes are so good by themselves.  A bit of salt and pepper, maybe a bit of extra butter, that is all these need for great flavor.

The other bonus to these is the price.  If I get a bag of potatoes for $0.99, I can make at least 5 batches of potatoes to go with dinner for my large family.  That is a side dish for five, that costs me less than a quarter!

Mashed Potatoes for 5
4-5 medium potatoes (I usually use one potato per person eating)
3 cloves of garlic peeled
1/4 stick of butter
1/3 cup milk (approximately)
salt and pepper to taste

Peel and chop the potatoes into chunks.  Put the chunks of potato and the garlic cloves into a sauce pan and just cover with water.  Bring to a boil and set the timer for 10 minutes.  Once the timer goes off, drain your potatoes and put them back into the pan.  Add in the butter and milk.  Mash the potatoes using a potato masher.

Salt and pepper to taste when served.  We also like to add a little extra butter when the potatoes are served.  You could also top with gravy if you like.

Saturday, October 27, 2012

Kung Pao Chicken


We have a local chinese restaraunt that is the most fantastic place.  It has been around in our community since my mother was a little girl.  Four generations of my family have eaten at this lovely little place.  It is not fancy, but the owners know the customers by name and often come to visit while you are waiting on your food.  The "new" owners came in over two decades ago.  It was one of the first restaraunts my hubby and I would go to when we were first dating.  The Eastern Garden is a piece of our community and our hearts.
Recently, the owner announced they would be closing the doors next summer.  We were so disappointed!  Their children have grown.  The youngest one is headed for college.  The owners are going to move so they can still live as a family while he attends college at a big university.
The last few times we went there I lamented how much I was going to miss them and their food.  I finally asked once what was in my favorite dish, Kung Pao Chicken.  The owner laughed and rattled off all the ingredients so fast I could hardly understand.  The next time, I went in with a pen and paper!  She never has measurements and her instructions are always so fast.  I wish I could just go in and watch them for a day! 
Each time we go in, I ask for another recipe.  Then I go home and experiment with it.  When we go back again, I ask her how I need to change it to get the flavor right.  I have gone home and played with the ingredients and measurements for the Kung Pao Chicken. This is pretty darn close to the Eastern Garden.
My family will miss the Eastern Garden when it is gone.  Over the next few months, we are going to try and go a little more often.  Once they have moved on to bigger and better things, I will make their recipes at home.  Everytime, I will think of the owners and how much they were a part of our community and our hearts.

Kung Pao Chicken

5 carrots
5 stalks celery
2 small zucchini
½ cup peanuts
2 chicken breast halves
3 cloves minced garlic
½ chopped onion
2 tablespoons butter
½ tablespoon red pepper flakes (more if you want it spicier)
3 tablespoons Soy sauce
2 teaspoons Cornstarch
1 cup water
2 cups cooked rice

Mince and chop onion and garlic. Cut remaining vegetables into bite size pieces.

Cut chicken into small bite size pieces.

Fry chicken pieces in large frying pan with butter, garlic, and onion until chicken is cooked through.

Stir in red pepper flakes, peanuts, carrots, and celery. Cook this, stirring occasionally, for approximately 5 minutes. Stir in zucchini and cook another 3-4 minutes, until the zuchini is softened a bit.

Stir together soy sauce, cold water, and cornstarch for sauce. Add into hot mixture and stir until sauce thickens.

Serve over cooked rice.

This makes enough for my family of 6 plus extra.

Sunday, October 21, 2012

SOUP DAY!

Yesterday, I decided it was SOUP DAY in our house.  No, not soup for dinner.  SOUP DAY in capital letters.  I decided I was going to make soup and can it for hubby and I's lunches.  I could have done one recipe of soup and we would have had a few soups for lunch.  I could have done two recipes of soup, and we really would have had enough for a while.  But no.  I am an over achiever.  I decided we needed three soup recipes.

It doesn't take that long to make soup, right?
It doesn't take that much longer to cut up vegetables for three soups then one soup, right?
I'll get into a groove, it will go quickly, right?

*snort*

Boy was I wrong!

I started at 8am, fueled by my coffee.  The house was still quiet because the kids were all in their Saturday morning stupor of sleeping in and cartoons.  First, the dishwasher needed to be unloaded and loaded and the counters needed to be cleared.  What kind of soup was I making?  The night before I decided on Taco Soup , My Best Bean Soup , and good old Split Pea and Bacon Soup.  My beans were already in the fridge, soaking and waiting their turns in the soup pot.

I chopped three whole heads of garlic, two large onions, twelve large carrots, and entire head of celery, and five tomatoes.  All ingredients went into their own seperate little bowls.  This doesn't sound like that much, but by the time I was done, I had children circling me like piranha wanting breakfast of some sort.

Break from soup to make pancakes, eggs, and bacon for brunch for the family.

Time to get the bacon ready for the soups.  I had a ten pound box of bacon waiting to be processed into usable amounts for the freezer.  Might as well get that done while my hands are greasy, right?

Okay, back to soup.

First the Best Bean Soup.  Jars, lids, and bands into the dishwasher.  I wasn't sure how many I was going to use in my SOUP DAY.  I figured close to 25, so that is what I loaded in and started.  I set up my pressure canner to warm up.  Then I finally started my bean soup.  Eight jars went into the pressure canner and had to process for 90 minutes once I got it up to the right pressure.

I had a little break in here.  I had to stay pretty close to the pressure canner, but I could at least focus on other things for a bit.  I helped hubby with a few car work things, agreed to friends coming over to visit and my boys going to a friend's to visit.  I put my daughter in charge of babysitting the pressure canner while I ran people to and fro.

OOOhhhh!  Pressure canner was a half an hour away from done.  This is when I figured it was time to get the next soup going.  Split Pea and Bacon went into the soup pot next.  The only down side was that I forgot just how long it takes for the pressure canner to come down in pressure so you can actually remove the jars.  An hour later I was finally ladeling the Split Pea into six jars and loading those into the pressure canner.  Those had to process for 75 minutes once I got them up to pressure.

Again, a little break while the soup was in the pressure canner to clean the kitchen from soup mess, switch laundry, and drive children to and fro.  (I seem to do that a lot on the weekends.)

About this time, hubby came in asking about dinner.  OY!  Yep, I only had two kinds of soup done and it was already time to start cooking dinner!!

OOOOOhhhhh!  Pressure canner was half an hour away from done.  Time to start the Taco Soup!  Yep, that's right.  I did it again.  Totally forgot how long it takes to cool the silly pressure cooker down.

I finally got the eight jars of Taco Soup into the pressure canner at 6pm.  I couldn't wait any longer to cook dinner.  I had three of my four burners going AND the broiler in order to cook dinner while my last batch of soup was going.  I ate dinner while I babysat the pressure cooker one last time for the day.

By the time the last batch of soup came out of the canner, it was 8:47pm.  I had been cooking for over twelve hours.  I am happy with my 22 jars of soup.  However, I don't think I'll be attempting three kinds of soup in one day again!!

Taco Soup Old and New

I love Taco Soup.  It seems like everyone has their own little spin on this lovely, body warming, soup.  It's great on cold fall days when you need something warm to fill your belly.  It's also really great for parties.  The first recipe is the one I started with.  It was given to me by a friend.  The recipe card is worn and stained and will always have a place in my file.  The second recipe is the one I use more often now.  Only because I am trying to get away from the preprocessed foods.  I do still use the taco seasoning packet because I haven't figured out my own mixture yet.  If anyone has a recipe they would like to share for the taco seasoning, I'd sure appreciate it!

Taco Soup Original Recipe
1 can corn (undrained)
1 can stewed tomatoes (undrained)
1 can tomato sauce
1 can kidney beans (drained and rinsed)
1 can olives sliced
1 lb browned burger
1 packet taco seasoning
Tortilla chips and taco toppings (cheese, sour cream, etc.)
Combine first seven ingredients in crockpot or soup pot.  Simmer until hot.  Serve with tortilla chips and toppings.


My altered Taco Soup Recipe
1 lb ground beef
3 cloves garlic minced
1 small onion minced
3 tomatoes chopped
1 cup dried kidney beans
1 cup dried black beans
1 cup dried pinto beans
1 can tomato sauce
4 cups of chicken broth
4 tablespoons of taco seasoning (this would be just over 1 packet)
2 cups frozen kernal corn
Taco Toppings (shredded cheese, sliced olives, etc.)
Tortilla chips
Soak the three kinds of beans over night in the fridge.  Drain and rinse.
Brown the ground beef with the onions and garlic until cooked through.  Drain fat.
Add in the chicken broth, tomatoes, taco seasoning, tomato sauce and beans.
Simmer until beans are done (or if canning just 30 minutes).
Add corn.
Serve with shredded cheese, olives, sour cream and tortilla chips.
If canning, this recipe made 8 pints of soup.  Process in a pressure canner at 10 pounds pressure for 90 minutes.

Friday, October 12, 2012

Now to start the fire....

Hubby recently moved our pellet stove from the living room into the dining room.  He said it was all hooked up and ready to start as soon as I deemed it cold enough for a fire.
I decided this morning that I was cold.  Even though my house is currently 63*f and I usually try to wait until it is below 60*f, I wanted a fire.  No big deal, right?

Now to start the fire.

First of all, the outlet next to the pellet stove has not been repaired.  The pellet stove will require an extension cord to plug it in.  Thank goodness, the cord from hubby installing the pellet stove was still there.  I ran the extension cord across the room to the nearest functioning outlet.

Now to start the fire.

Wait.  No one cleaned the pellet stove out the last time it was run.  I can clean the silly thing.  20 minutes later, the pellet stove is relatively free of ashes and the glass is mostly clean.

Now to start the fire.

Crumple the paper, add the pellets into the basket.  Lamp oil.  Where is the lamp oil?  We kept it on the shelf above where the pellet stove used to be.  Now there is an entertainment center there.  The shelf is behind the entertainment center.  But look, there's the lamp oil!  I am short and cannot reach it.  I get my kitchen step ladder and set it up in front of the entertainment shrine.  Reaching as far as I can without toppling the TV I can barely reach the lamp oil.  There is just enough left in the bottle to start the fire maybe two or three times.  Mental note, add lamp oil to shopping list.  Put lamp oil on pellets and paper.

Now to start the fire.

Where is the lighter?  Where is ANY lighter?  Matches?  Come on, there must be some source of flame here.  I wander around the house looking all the likely places that a lighter would be placed.  Then all of the unlikely places there might just be a lighter or matches.  Finally, I find hubby's little hand held blow torch that lights itself.  That will work!

Now to start the fire.

Everything is set up.  Fire is lit.  I am no longer cold or in need of a fire because of all the activity has warmed me nicely.

That's okay though.  I forgot to turn on the auger.  So, in the time it took me to write this post, the fire went out.

Sunday, October 7, 2012

Lasagna

This is not a quick dinner.  It has a lot of prep work, but it is oh so worth it!  I wrote this recipe in a different format.  I wrote down everything as I did it.  If you gather all of your ingredients, you should be able to work your way through the recipe and end with fantastic lasagna!

Ingredients:
2 cups spinach
2 cups ricotta cheese
2 eggs
2 cups broccoli
1 small zucchini
¼ pound sliced mushrooms
1 15oz can tomato sauce
2 pounds ground beef
½ onion
3 cloves garlic
1 pound mozzarella
½ pound Romano
½ pound parmesan (plus more for topping)
6 lasagna noodles

In separate bowl mix…
2 cups fresh spinach chopped
2 cups ricotta cheese (the smaller container is just under this amount, I use that)
2 eggs

Prep the Vegetables…
2 cups chopped broccoli
1 small zucchini sliced thinly (I found that my cheese slicer actually worked really well for getting the thin slices lengthwise of the zuchini)
1/4 pound sliced mushrooms
1 can tomato sauce (15 oz)

Make the Sauce…
2 pounds ground beef
½ onion chopped
3 cloves garlic chopped
1 jar of your favorite marinara sauce

Brown the ground beef, onion, and garlic together in a deep frying pan.  Mix in the sauce and remove from the heat.

Cheeses all shredded…
1 pound mozzarella
½ pound Romano
½ pound parmesan (plus more for topping)

Cook 6 lasagna noodles for 12 minutes.  Remove from water to cookie cooling rack.  Lay them out flat in a single layer.  If they are stacked, they will stick to eachother.

Assemble…
In a 10.5in x 11.75in x 2in baking pan pour just enough tomato sauce to cover the bottom.  Add remaining tomato sauce into the meat sauce.

Sprinkle with mozzarella cheese. 
Lay in 3 noodles spread evenly in pan.
Lay in a layer of mushrooms
Lay in the spinach and ricotta cheese mixture
Lay in a layer of zucchini slices
Lay in a layer of meat sauce
Cover in Romano cheese
Lay in 3 noodles spread evenly in pan
Lay in a layer of chopped broccoli
Lay in a layer of remaining meat sauce
Lay in a layer of remaining mozzarella cheese
Layer with parmesan cheese

Bake at 425* for approximately an hour, or until bubbly and lightly browned on top.  Let cool for a few minutes before cutting and serving.  Top with extra parmesan cheese.

Sunday, September 16, 2012

Best Bean Soup Ever!!


This is my bean soup recipe for canning.  It is amazing.  If you don't want to can it, you will have to change the cooking time.  Simmer it until the beans are tender.  Adding in the carrots and celery about ten minutes before they are done.
 
Ingredients:
1 pound bag of 16 bean soup bean mixture
3 cloves garlic
3 small onions
6 carrots
3 stalks celery
Apx 2 cups raw bacon pieces cut into bites
1 box (32 oz) chicken stock

Instructions:
Soak the bean mixture in the refrigerator over night.
Mince garlic, chop onions.  Chop carrots and celery into chunks.  Set aside for later.  Fry garlic and onions in pan with bacon pieces.  Cook until bacon is done and onions are translucent.  Drain fat.
 
Drain and rinse the beans.
 
Put the chicken stock in the pot.  Add in the beans.  You should have enough liquid to cover the beans.  Stir and bring to a boil.
Turn down and simmer for 30 minutes.
Stir in celery and carrots.
 
Scoop into pint size jars leaving 1 inch head space.  Should make 6 jars of soup.
Process according to your pressure canner instructions at 10 pounds pressure for 75 minutes.
 

Breakfast Cookies!

These are lovely moist cookies that make for a healthy quick breakfast. They were a huge hit with all the children in the household.

This is my inspiration for this recipe. I didn't have any applesauce on hand, but I did have plenty of frozen mashed bananas. None of my children will eat raisins, so I put in chocolate chips instead.

My version is this...

Banana Oatmeal Cookies

Ingredients:
2 C uncooked rolled oats
2 C mashed banana
1/4 C whole milk
1/2 C semi-sweet chocolate chips
1 tsp vanilla
1 tsp cinamon
2 tsp sugar

Directions
Preheat oven to 350*F.
Mix all ingredients in a bowl.
Let the ingredients sit for about five minutes so the oats soak up some of the moisture.
Spoon the mixture onto a greased cookie sheet. You can put them pretty close to each other. The cookie will not spread out as it cooks and will keep the shape you put them in.
Bake for 18 minutes.
Remove from oven and allow to cool a bit before you eat.

One batch makes approximately 24 small cookies.

I'm thinking these would freeze very well, though we don't have any left after four kids ran through the kitchen a few times.

Friday, July 20, 2012

Crockpot Stroganoff

This is one of my favorite ways to take care of leftover beef.  I've used roast, steak, and burger.  All are wonderful in their own ways.  Today I'm using leftover steak.  I try to cook extra when we BBQ just because it adds such a fantastic flavor to the meal.

Ingredients:
4 cloves minced garlic
1 cup chopped onion
2 cups sliced celery
4 cups sliced mushrooms (I love mushrooms.  Less is okay if you aren't a big fan.)
3 cups cubed leftover meat
6 Tblsp brown gravy mix (two packets)
4 cups water

Before serving you will also need:
1 cup sour cream
cooked noodles or rice
shredded cheese (optional)


Once you have all the ingredients gathered and prepped, this recipe goes pretty quickly.

Pour the four cups of water into your crockpot and whisk in the gravy mix powder.


Now to add the rest of the ingredients.  I put the onions and garlic in first.  Follow that with the celery, then the meat.  Top it all with the mushrooms.

Cook on low in the crockpot for about 5 hours.  The meat will be melt in your mouth tender and the veggies will all be cooked nicely.

*picture to come*

Before serving, stir in 1 cup of sour cream.  This gives the stroganoff a nice creamy flavor.  You can also stir in a small can of condensed cream of mushroom soup if you like an even creamier stroganoff.

*picture to come*

Serve over the top of cooked noodles or rice.  Top it all with shredded cheese!


Friday, June 8, 2012

Taco Bake

This is a delicious dinner even my picky kids loved! 

Taco Bake
1 ½ pounds ground beef
½ onion (chopped)
3 cloves of garlic (minced)
Two small tomatoes chopped
2 tablespoons taco seasoning
1 cup water
3 cups shredded cheese (I used cheddar)
Cornbread recipe
Tomato Topping

Preheat oven to 350*F.

Brown the burger with the onions and garlic until cooked through.  Add tomatoes, taco seasoning, and water.  Let simmer while you prepare the cornbread.

Spread your prepared cornbread dough into the bottom of a well greased 9x13 baking dish.  If your mixture is soupy, drain off the liquid first.  Then top the dough with the hamburger mixture. 

Sprinkle with as much cheese as you would like.

Bake in 350*F oven for approximately 30 minutes or until the cornbread is nicely browned.  I can see my cornbread through the clear baking dish.  If you are using a darker dish you may have to poke it with a toothpick.  The toothpick should come out clean.

Top with Spicy Tomato Topping and extra cheese!  Delish!


Spicy Tomato Topping

 4 small tomatoes diced
2 tablespoons dried cilantro
1 tablespoon paprika
1 teaspoon habenero sauce

 Put all the ingredients in a frying pan and simmer while the Taco Bake cooks.  It will cook down into a lovely little sauce to serve on top.

My dream....

Last summer we found my dream place.  The kids and I fell in love with this property on sight.  Hubby required a bit of convincing that the smaller amount of land would work.

No matter how much we loved this place, we still couldn't afford it.  We didn't give up though!  Over the last year we have worked hard to reduce our debt and curb our spending.  Now we are so close to achieving this dream!

The view from the end of the school building to the baseball diamond at the end of the property.
The back property line is a lovely little river.  It's far enough of a drop from the property to no pose a flooding danger.  So idealic!
Six full size classrooms!  The family is all excited about a bit more space to move around.
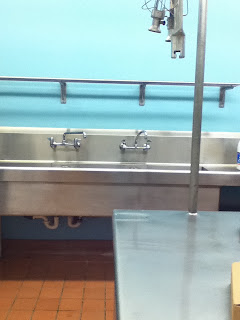
I am absolutely GIDDY over this kitchen.  I could cook and process food so easily with this space.  All commercial grade and size.
This mixer is as tall as I am.  I don't know what I would use a mixer this size to make, but by golly I want to use it!!
This is a dream pantry.  Notice the second mixer down on the floor.  That little bad boy is at least three times the size of my current Kitchenaide.


The natural lighting in this place is AMAZING.  The only pictures we took with lights on were in the cafeteria, kitchen, and gym.
That's right.  I said GYM.  Can you imagine the glory of a cold and rainy winter day spent playing basketball in your own personal gym?!
 I am so excited by all the prospects of this property.  Now we have to make it through the reality of financing and negotiating.  Wish us luck!  Pray!

*Edited to add*
Well, it looks like a couple more months of scrimping and saving.  They have come so far down on the price already, there isn't much wiggle room for negotiations.  I'll be patient.  Even at their asking price, we are only a few  months away from being able to do it.
We will still get started on the financing end.  That way we know where we are for sure.
Keep those good thoughts coming!

Monday, June 4, 2012

Lemon Meringue Pie

Oh, this pie is so heavenly! I was amazed by how many eggs it takes, but it is worth EVERY one! This will give you some good practice seperating eggs if you haven't practiced before. I always crack eggs into a small custard dish, then pour the egg over my hand into the whites bowl. The whites go through my fingers, then I can set the yolk into the other bowl. Many people rock the yolk back and forth between the egg shells. I tend to break the yolk when I do it this way.
This is a time consuming recipe. From start to finish it takes several hours. It is so delicious though, I am willing to work and wait!

Lemon Meringue Pie
Ingredients:
16 eggs
4 cup sugar – divided (2 for filling 2 for meringue)
2 cup fresh lemon juice
1 pie crust (I like graham)

1. Preheat oven to 325*F.
2. Separate yolks and whites of all 16 eggs into separate bowls.
3. Using an electric mixer get the whites started whisking for the meringue. This will take a while to form nice high peaks.
4. In a medium sauce pan, whisk the yolks and 2 cups of the sugar together. Add the lemon juice and stir.
5. Heat on low and stir with a flat ended spoon or spatula until it thickens up. Stir the entire time and keep scraping the bottom of the pan. You want to cook the egg yolks, but not end up with scrambled eggs. This will take about 10 to 15 minutes. Be patient!
6. Immediately transfer the lemon mixture into the pie crust and spread evenly.
7. By now your meringue should be starting to get nice peaks. SLOWLY add the two cups of sugar into the meringue. It will make your peaks fall, just keep it whisking until the peaks form again.
8. Top your pie with meringue! You will end up with extra meringue; I like to use it for meringue cookies.
9. Bake your pie at 325*F for about an hour or until the meringue has a nice golden brown top.

Allow to cool completely before serving.

Monday, May 28, 2012

Home Made Ravioli


Today for lunch, I made homemade ravioli served with marinara sauce.  It was SO DELICIOUS!!  Even the kids were begging for more.  They were a bit of work.  However, it worked out much cheaper than the freezer burned ones I can get at our local store.  Plus, I know exactly what went into them!  Here is the recipe for my homemade pasta and a quick tutorial for making raviolis.


2 cup               all purpose flour (plus some to flour the board)
½ tsp                salt
2                      beaten eggs
1/3 cup            water
1 tsp                oil

In a large mixing bowl stir together flour and salt.  Combine eggs, water and oil.  Form a well into the flour mixture and pour the egg mixture into it.
Mix well.
Turn the dough out onto a floured board. 
Knead the dough for 8 minutes.  It will become smooth and elastic.
Dough can be refrigerated for up to three days.
Roll dough out to desired thickness and shape.
Cook until no longer doughy in the middle.  Or, dry and store in an air tight container.

Now for the photo tutorial….


Flour mixture with the well in the middle, pour the egg mixture right in the middle.


I just mixed the whole thing with my hands.  Once it forms a nice ball, turn it out onto the floured surface.  Wash your hands and get ready for your arm exercise for the day!!


Knead for 8 minutes.  Whew!


Let the dough rest for a bit while you make your filling.  I used homemade ricotta, mozzarella, fresh shredded parmesan, and fresh shredded Romano.


Now it’s time to roll out that dough.  Cut the dough ball into quarters.  I used my trusty Atlas pasta roller.  If you don’t have one of these, a rolling pin will work just fine.  You want the dough fairly thin, but not to the point it will rip when you work with it.  I went to a level 5 on my pasta roller.

Next put a spoonful of filling spaced evenly on your pasta dough.  Wet the edges and fold over or put the top layer of dough on.  We used a fork to press the edges closed.  Be careful not to puncture the pocket with the filling in it.  If you do, your filling will come out in the boiling water. 

Lesson learned….don’t stack the ravioli.  I had to carefully pry all the ravioli apart after I told my daughter she could stack them.  They stuck to each other pretty well.

When you are ready to cook, get a nice big pot of water boiling on the stovetop.  I put salt and a little butter in my water.  It helps to prevent it from boiling over, and prevents the pasta from sticking to each other.

Once the water is at a full rolling boil, gently drop the ravioli into the water one at a time.  I only cooked five or six at a time to keep them from sticking.  You know they are done when they have been floating at the top of the water for a minute or two.  I think I cooked mine for maybe 5 minutes.

Remove the ravioli with a slotted spoon.  Add in the next batch while you dish up the done ones.  I topped them with marinara and more shredded parmesean cheese.

One batch of dough made 19 rather large ravioli.  I’m sure we could have been much more efficient in our cutting/shaping of the ravioli and gotten a few more.  I ate three personally, and that was enough for me to not be hungry.  I probably could have eaten one more. 


Saturday, May 26, 2012

Our Adventure in Self-Sustainability


My family is embarking on an adventure of self-sustainability. We are going to try and become as self-sustainable as possible within the range of our abilities.

What is self-sustainable? Well, for some it means living in a tent in the woods completely independent from culture and society as we know it. This is not the self-sustainability that we are looking for. I am way too comfortable with a few of modern society's conventions.

I'm not giving up my car. I live in a very rural community. The nearest larger grocery store is 45 minutes away. My husband's commute to work is 45 minutes one direction. My longest commute is 15 minutes one direction. None of these distances sound reasonable on a bike for me. I am, however, committed to trying to walk and bike within our small community as much as I reasonably can.

I'm not giving up internet. Ah, internet, I think this is the one modern convenience that is a guilty pleasure for me. I simply depend on the wondrous amounts of information at my fingertips. How do I make/do something? Head to the internet!

You will still see me at our grocery store. Gardening is the one area that I am really struggling with. I *want* to be a good gardener. I *want* to provide my family with healthy home grown food. The one year I was successful in growing a garden, I grew Barbie food. Seriously, I grew fully ripened green bell peppers that would fit on a quarter. Fully ripened carrots were smaller than my pinkie. It was sad. I’m not giving up though. I have my lovely container garden going on the back porch this year. My little fledgling starts are planted and watched over. We shall see if we actually get any food from them in a few weeks. We do try to purchase from local farmers as much as possible. I hope to increase those purchases and decrease the purchases from commercial producers even further.

We are trying to minimize our purchases and pay off our debts. We are looking at one large purchase in the next few months. I have my eye on a piece of property that I believe would be a great little homestead for us. A few financial things have to fall into place, and then we can make it work. For now, we will continue to learn and grow on our little slice of neighborhood.

So, I hope you will join me. Follow my adventures in learning to become more self-sufficient in our modern world. I’ll be talking about homemade, homegrown, and community living. Sometimes the commercial alternative may be the best choice, but I hope that I can find sustainable alternatives to as many things as possible.

Do you have a topic you would like to see a post about? Comment! I’ll see what I can learn and share about it.

Multnomah Falls Hiking Trip

My family loves to hike. I thought I would share some of our adventures here along with all the recipes.
Our latest hike was to Multnomah Falls. This was such a breathtaking place to go. It was a bit crowded with people. That normally isn't one of our favorite things. Today it wasn't that bad. I know I heard at least five different languages being spoken around us as we climbed the trail.
My daughter is the wonder photographer for all of our trips. It means we get some really great shots of nature, lots of close up flowers, and maybe one or two pictures of her brothers.
A quick family pic taken by my hubby.
This was a lovely little waterfall we saw as we climbed up the trail to the stone bridge.


The view from the stone bridge was beautiful!


I just love her eye for a photograph.
This was an interesting little hole in the side of the cliff. It just begged for a photo!

Finally, a photo of hubby and I together!

After our trip to Multnomah Falls, we went on to a friend's house. Our daughter had a field day taking pictures in their flower garden.


If you would like to see more of her photos, head to her blog at PinkMenace New Camera